
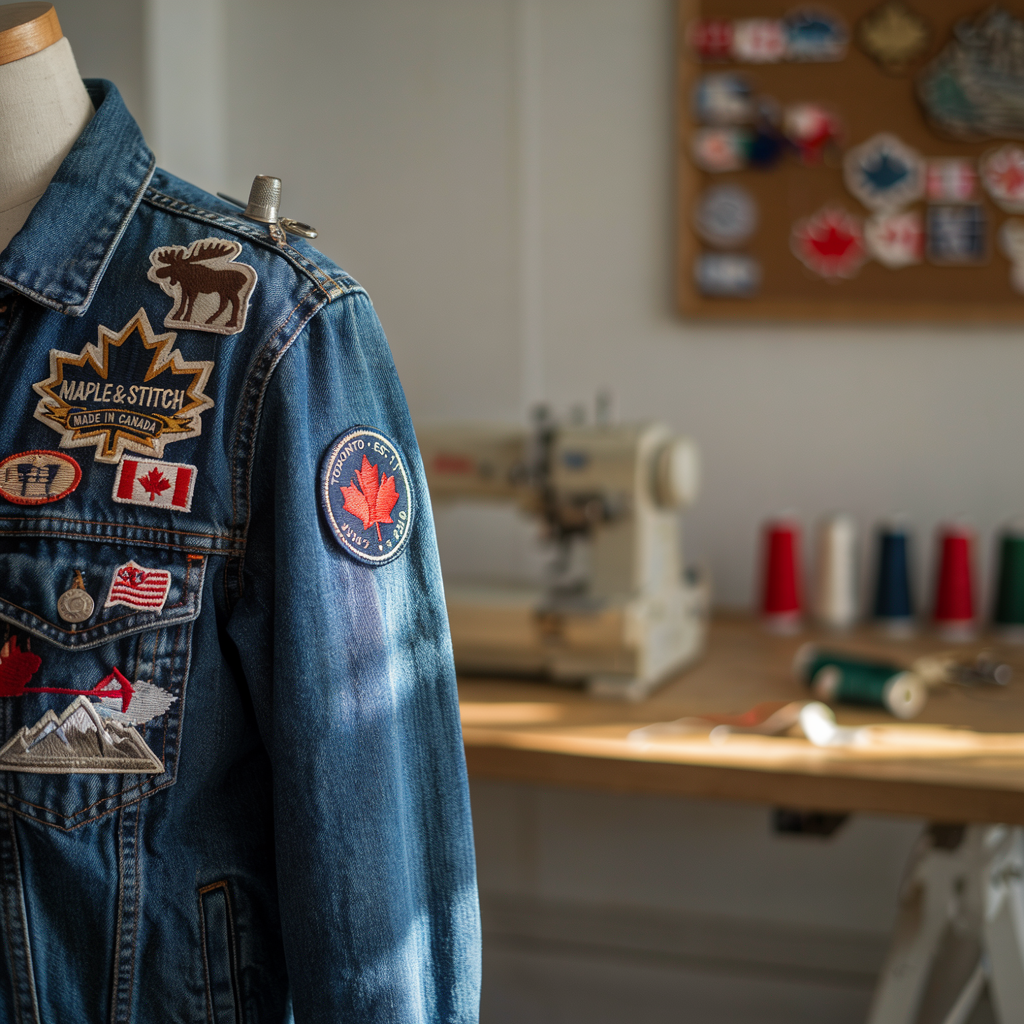
A patch does a lot of quiet work for something so small. It tells people who made the jacket, who rides with the club, or which team someone plays for. Get it right and nobody thinks twice about it. Get it wrong and it’s the first thing people notice.
At Stitch Patches CA, we spend most of our working day digitizing logos, matching thread colours, and answering the same handful of questions from first-time buyers — so we put together this guide to cover exactly what you need to know before ordering custom embroidered patches in Canada, whether this is your first order or your fiftieth.
Table of Contents
- What Is a Custom Embroidered Patch?
- Why Embroidery Still Wins in the Canadian Market
- Types of Custom Patches: The Full Material Breakdown
- Backing Options: Iron-On vs. Sew-On vs. Velcro
- Patch Size Guide
- How a Patch Gets Made
- Designing a Patch That Actually Stitches Well
- Canada-Specific Buying Advice
- Expert Tips From the Embroidery Floor
- Common Mistakes to Avoid
- Your Pre-Order Checklist
- Why Choose Stitch Patches CA
- Frequently Asked Questions
What Is a Custom Embroidered Patch?
Quick answer: A custom embroidered patch is a piece of fabric — usually twill or felt — with a design stitched into it using coloured thread, cut to shape, finished along the edge, and fitted with a backing so it can be attached to a garment. “Custom” means the design, size, colours, and backing are built around your artwork rather than picked from a stock catalogue.
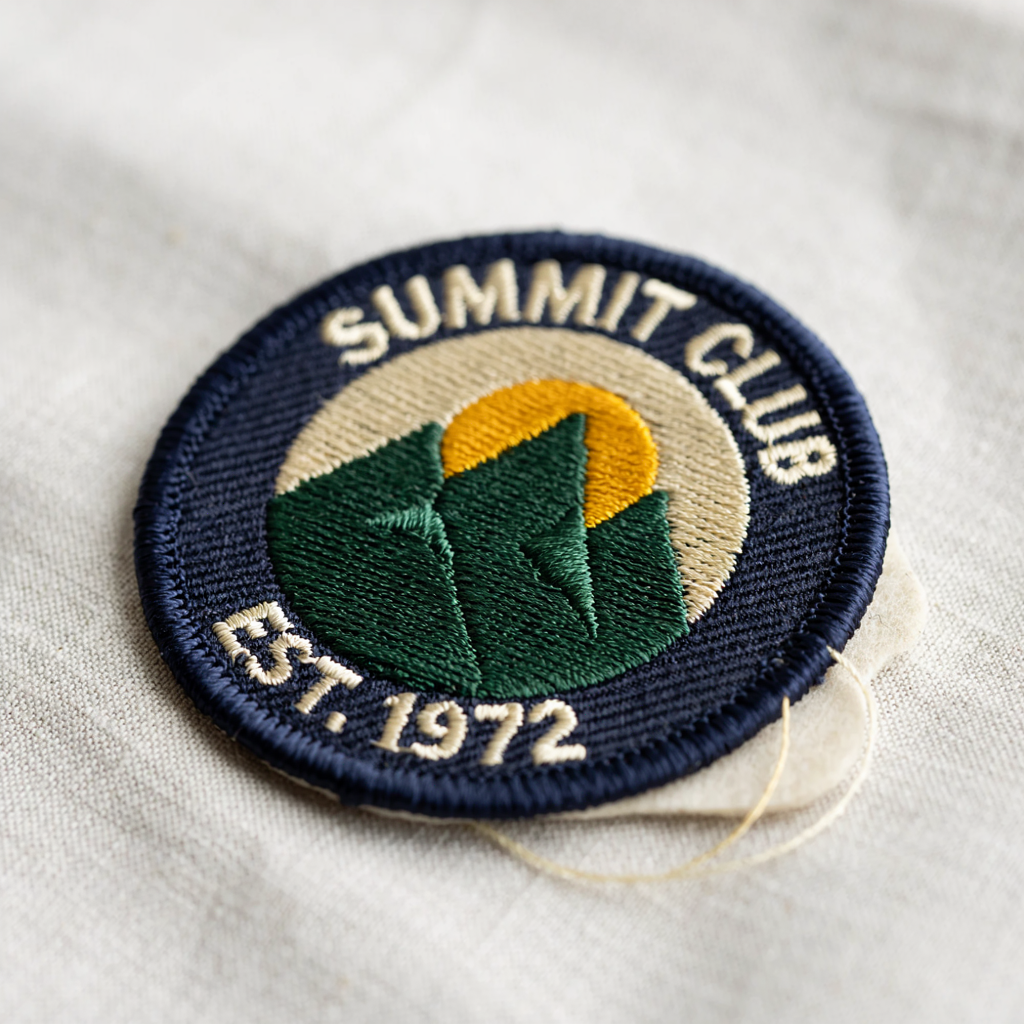
The part most guides skip is why embroidered patches look and feel the way they do. It comes down to stitch density — how tightly the thread is packed into a given area. Too loose, and the base fabric peeks through, making the patch look thin. Too dense, and the patch stiffens and puckers at the edges. Getting that balance right is most of what separates a patch that looks premium from one that looks cheap, and it’s something buyers rarely know to ask about.
A finished patch is really three layers working together: the base fabric, the embroidered thread that carries the design, and the backing that determines how it attaches to whatever it’s going on. Change any one of those three and you get a genuinely different product.
Why Embroidery Still Wins in the Canadian Market
Printed labels are cheaper. Heat-transfer vinyl is faster. So why do embroidered patches remain the default choice across Canadian workwear, motorcycle clubs, sports teams, and small businesses?
Durability holds up to real winters. Road salt, freeze-thaw cycling, and heavy wash-and-dry loads will crack printed vinyl and fade sublimated ink long before a well-finished embroidered patch shows real wear. Thread simply doesn’t peel the way print does.
Texture reads as quality. There’s a tactile signal embroidery sends that flat print can’t fake — people register a patch as well-made before they’ve looked closely. For Canadian clothing patches used by clubs, teams, and brands where credibility matters, that cue does real work.
It photographs well. Raised thread catches light in a way flat print doesn’t, which matters more than it used to now that so much brand exposure happens through product photos and video rather than someone examining a garment in person.
None of this makes embroidery the right call for every application — we’ll cover exactly when it isn’t further down. But for the majority of uniform, club, team, and branding use cases across Canadian businesses, it remains the category leader.
Types of Custom Patches: The Full Material Breakdown
Each patch type solves a slightly different problem. Get the match wrong and you’ll either overpay for durability you don’t need or underspend on durability you do.
Embroidered Patches
The standard: thread stitched onto a twill or felt base, finished with a merrowed (overlocked) or laser-cut border. Best for logos, crests, lettering, and any design where a raised, textured finish reads as premium. This is also where most custom logo patches Canada businesses start, since embroidery handles moderate detail well and holds up across long-term wear. Detail starts to lose clarity below roughly 1 inch if the design has fine linework or small text.
Chenille Patches
The fuzzy, high-pile texture recognizable from varsity jackets and letterman patches. Built from looped yarn rather than flat thread, chenille carries bold block letters and simple shapes well but isn’t suited to fine detail. Popular for school and athletic letterman jackets, and increasingly for streetwear brands chasing a retro look.
Woven Patches
Where embroidery struggles with fine detail, woven patches take over. The design is woven directly into a flat fabric using fine polyester threads, closer to how a label is made than how a patch is stitched. The result is a smooth, low-profile patch that renders small text and intricate linework embroidery can’t stitch cleanly. If your logo has text smaller than roughly 6-point equivalent, custom woven patches are usually the better technical choice, not just a style preference.
PVC (Rubber) Patches
Moulded rather than stitched, PVC patches are fully waterproof and hold up to conditions that eventually wear down thread — marine environments, extended outdoor exposure, tactical gear that gets rained on and dried out repeatedly. They also allow a raised, 3D look embroidery can’t replicate. The tradeoff is texture: PVC has a modern, rubbery finish rather than a traditional stitched one. See our custom PVC patches options where weatherproofing matters more than classic texture.
Printed (Sublimated) Patches
For photo-realistic detail, gradients, or colour counts embroidery can’t practically handle, custom printed patches use dye-sublimation to transfer full-colour artwork onto a fabric base. Flat rather than textured, but unmatched for colour range.
Bullion Patches
What is a bullion patch? A bullion patch is embroidered using metallic gold or silver wire-wrapped thread instead of standard thread. The metallic finish gives it a formal, almost sculptural look — which is why you’ll see bullion on military rank insignia, blazer crests, and formal club regalia rather than everyday workwear.
Bullion work is slower and more labour-intensive than standard embroidery, and priced accordingly, but for formal or ceremonial applications there’s genuinely no substitute. Explore custom bullion patches if your project calls for that level of formality.
Leather Patches
Stamped or engraved rather than stitched, leather patches bring a rugged, premium look to denim, bags, and outerwear. Genuine leather ages and develops character over time; faux leather offers a similar look at lower cost and more consistent colour matching. Browse custom leather patches for jacket branding with a different texture story than embroidery.
What are the different types of custom patches?” The main types are embroidered (thread-stitched, textured), chenille (fuzzy yarn texture), woven (flat, fine-detail capable), PVC/rubber (moulded, waterproof), printed/sublimated (full-colour), bullion (metallic wire thread, formal use), and leather (stamped or engraved). The right choice depends on the detail level in your design, the durability the application requires, and the finish you want.
Material Comparison: Which Patch Type Fits Your Project?
| Patch Type | Best For | Detail Level | Durability | Price Tier |
|---|---|---|---|---|
| Embroidered | Logos, crests, general branding | Moderate | High | $ |
| Chenille | Varsity/letterman, bold simple shapes | Low | High | $$ |
| Woven | Fine text, gradients, small designs | Very High | High | $$ |
| PVC | Outdoor gear, tactical, waterproof needs | Moderate–High | Very High | $$ |
| Printed | Photo-realistic, multi-colour art | Very High | Moderate | $ |
| Bullion | Military insignia, formal/heritage branding | High (formal style) | High | $$$ |
| Leather | Denim, bags, rugged branding | Low–Moderate | Very High | $$ |
Embroidered vs. Woven vs. PVC: The Comparison Most Buyers Actually Need
| Factor | Embroidered | Woven | PVC |
|---|---|---|---|
| Surface feel | Raised, textured | Flat, smooth | Rubbery, glossy |
| Fine detail / small text | Limited below ~1″ | Excellent, even at small sizes | Good, softens at very fine lines |
| Weather/water resistance | Moderate | Moderate | Excellent — fully waterproof |
| Classic/traditional appeal | Strongest | Moderate | Weakest (reads as modern) |
| Colour handling | Best with 8 or fewer solid colours | Handles more colours cleanly | Handles gradients well |
| Typical use case | Uniforms, crests, general branding | Small detailed logos, corporate branding | Tactical gear, outdoor apparel, marine use |
If you’re stuck between two of these: fine text or gradient shading points to woven, genuine outdoor abuse points to PVC, and everything else defaults to embroidered.
Backing Options: Iron-On vs. Sew-On vs. Velcro
The backing determines how the patch actually stays on the garment, and it’s one of the most under-thought decisions in the ordering process. Buyers often spend far more time picking colours than picking a backing, even though the backing is what determines whether the patch is still attached a year from now.
Iron-on backing uses a heat-activated adhesive film — press it on with an iron or heat press and it bonds to the fabric. Fast and requires no sewing skill, but it’s the least permanent option and can lift at the edges on garments that see frequent heavy washing.
Sew-on backing has no adhesive at all; the patch is stitched directly onto the garment around its full perimeter. This is the most durable and secure option, which is why it’s the default for uniforms and workwear that need to survive years of wash cycles.
Velcro (hook-and-loop) backing splits into two pieces — a hook side on the patch, a loop side sewn onto the garment — letting the patch be removed and swapped at will. Standard for tactical gear, motorcycle clubs, and name patches that change with staff turnover.
Adhesive (peel-and-stick) backing is the least durable, intended for short-term use — trade show giveaways, promotional events, one-off pieces. Don’t use it for anything you plan to wash.
There’s also heat-seal backing, an industrial-strength step up from basic iron-on, and combination backing (adhesive placement plus a sewing channel for reinforcement).
What’s the difference between iron-on and sew-on patches?” Iron-on patches attach using heat-activated adhesive and need no sewing, but they can lift over time with frequent washing. Sew-on patches attach with stitching around the full edge and have no adhesive, making them the most secure and long-lasting option — the standard for uniforms and workwear.
Backing Comparison Table
| Backing Type | Application | Best Use Case | Permanence | Reusable? |
|---|---|---|---|---|
| Iron-On | Heat press or iron | Fashion patches, light-use apparel | Moderate | No |
| Sew-On | Hand or machine stitching | Uniforms, workwear, motorcycle jackets | Highest | No |
| Velcro (Hook & Loop) | Hook and loop sides sewn separately | Tactical gear, rotating name patches | High | Yes |
| Adhesive (Peel & Stick) | Peel and press | Trade shows, one-time events | Low | No |
| Heat-Seal | Heat press, industrial adhesive | Bulk uniform orders, retail apparel | High | No |
Our rule of thumb: if the garment gets washed regularly, go sew-on. If the patch needs to move between garments, go Velcro. Iron-on sits in between — casual, low-wash, budget-conscious.
Patch Size Guide
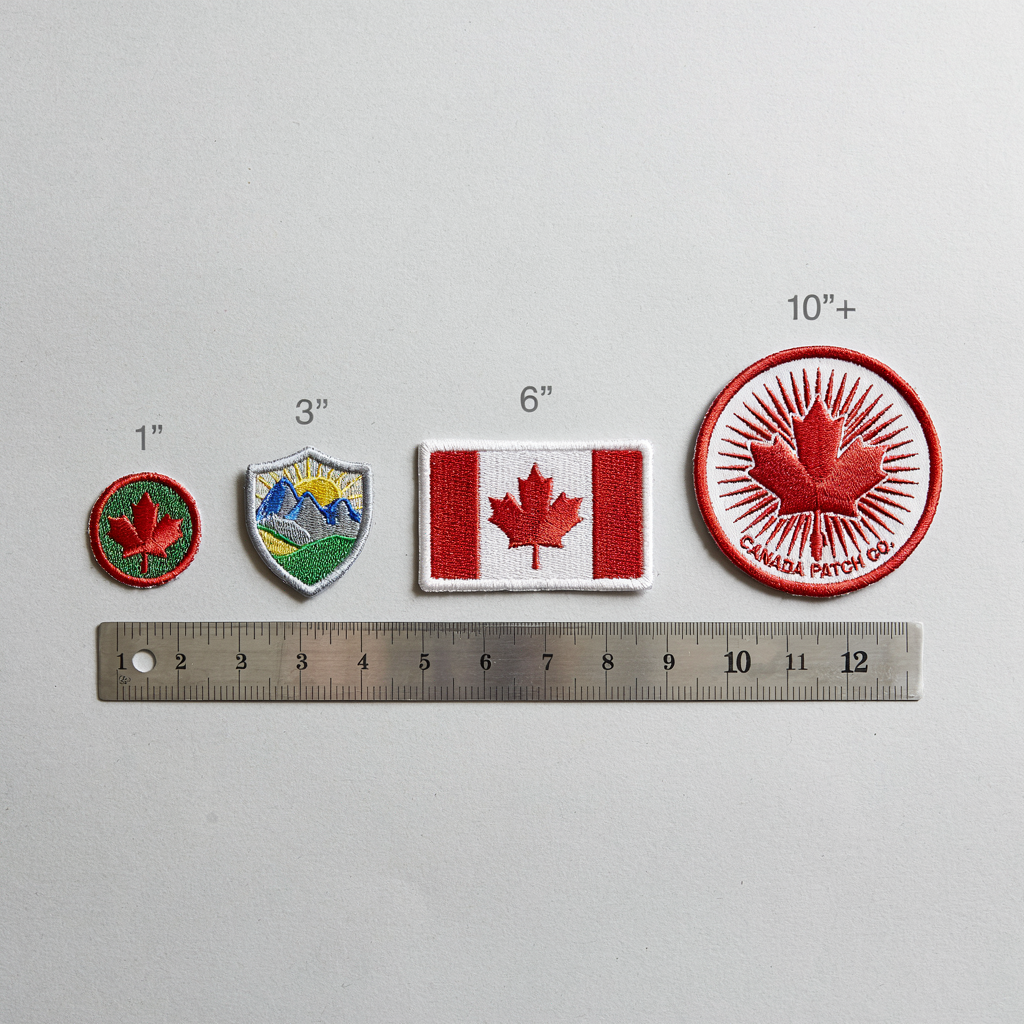
| Size Range | Common Placement | Notes |
|---|---|---|
| 1″ – 2″ | Caps, collars, small chest logos | Fine detail struggles below 1.5″ in embroidery — consider woven for small text |
| 2″ – 4″ | Chest logos, standard uniform patches | The most common size for corporate and uniform branding |
| 4″ – 6″ | Sleeve patches, statement designs | Enough room for moderate detail and short taglines |
| 6″ – 10″ | Large crests, club emblems | Standard for motorcycle club centre patches |
| 10″+ | Back patches | Motorcycle clubs, streetwear back branding |
Hat and cap patches deserve a separate note. Caps curve, which means larger or stiffer patches can pucker across the crown. For structured caps, we generally recommend staying under 3 inches wide with a slightly more flexible backing. Velcro hat patches and custom hat patches Canada options are built with cap curvature in mind rather than adapted from flat-patch templates.
What Custom Embroidered Patches Actually Cost in Canada
Five factors drive the price, roughly in order of impact:
- Quantity — the biggest lever. Setup and digitizing costs spread across the run, so unit price drops sharply as order size grows.
- Size — larger patches use more thread and take longer to stitch.
- Stitch density / complexity — a simple three-colour logo costs less than a detailed crest with fine shading.
- Number of thread colours — each colour change adds machine time.
- Backing type — sew-on and basic iron-on are typically least expensive; Velcro and heat-seal add a small premium.
Decision Table: Is Your Order Big Enough for Bulk Pricing?
| If you need… | Consider… |
|---|---|
| Fewer than 25 patches, one-off event | Small-batch pricing — a higher per-unit cost, but no reason to over-order |
| 25–100 patches for a team or small business | Mid-tier pricing — worth checking if rounding up to the next price break saves money overall |
| 100+ patches for uniforms or retail rollout | Bulk pricing — where custom patches become cost-competitive with printed alternatives |
| Ongoing, recurring orders | Ask about repeat-order pricing — reusing an already-digitized file skips the setup cost |
How a Patch Gets Made
- Artwork review — your design is checked for embroidery feasibility before production starts; fine lines and tiny text get flagged here.
- Digitizing — a digitizer converts the artwork into a stitch file specifying every needle movement and direction change. This is skilled work and the biggest quality differentiator between manufacturers that most buyers never see directly.
- Thread and colour matching — colours are matched to the closest available thread shade, usually against a Pantone reference.
- Sampling (for larger or complex orders) — a test patch is stitched and checked against the original artwork.
- Production run — industrial machines stitch the design onto the base fabric, layer by layer, colour by colour.
- Border finishing — the patch is cut to shape and finished with a merrowed or laser-cut edge.
- Backing application — the chosen backing is applied to the reverse side.
- Quality inspection — every finished patch is checked for stitch consistency, colour accuracy, and backing adhesion before packing.
Standard turnaround for most Canadian patch orders runs 7–10 business days after design approval, with rush production available for time-sensitive orders. Larger or more detailed runs — heavy stitching, many colours, bullion work — take longer.
Designing a Patch That Actually Stitches Well
Simplify before digitizing. A logo that looks sharp on a business card can turn muddy once stitched, especially at smaller sizes. Fine linework and small text are the two most common casualties.
Solid colours beat gradients. Embroidery thread comes in a fixed range of solid shades, so smooth gradients get approximated through thread blending and rarely match a screen render exactly. If gradients matter to your brand, a printed or woven patch reproduces them more faithfully.
Bold fonts survive stitching; thin ones don’t. Script fonts and anything under roughly 6 points of stitched height tend to lose legibility fast.
Placement affects how much detail you need. A design meant for a 2-inch chest logo and one meant for a 10-inch back patch aren’t the same design at different scales — they need different levels of detail for their viewing distance.
Supply the cleanest file you have. Vector files (AI, EPS, SVG) digitize faster and more accurately than low-resolution rasters. If all you have is an old JPEG, say so upfront — most manufacturers, including us, offer redraw or recreation services.
Canada-Specific Buying Advice
A few considerations that come up specifically for Canadian businesses and buyers ordering across such a large, varied country.
Climate affects backing choice more than most buyers expect. For outerwear and workwear that sees a genuine Canadian winter, sew-on backing on embroidered or PVC patches consistently outlasts adhesive-only options once freeze-thaw and road salt enter the picture.
Regional industries lean toward different patch types. Alberta’s trades and oil-and-gas workforce often prioritize durable sew-on or PVC patches for hi-vis workwear. British Columbia’s outdoor and marine-adjacent businesses frequently choose PVC for water resistance. Ontario’s corporate, hospitality, and retail sectors lean toward standard embroidered patches for uniform branding. Quebec businesses operating bilingually should plan patch text and layout with both English and French in mind from the start, since retrofitting a design for a second language usually means a full redigitizing pass, not a quick edit.
Motorcycle club patch culture has its own conventions. Centre patches, top rockers, bottom rockers, and rank patches follow fairly established sizing and placement traditions within Canadian riding communities, worth discussing directly with your manufacturer rather than guessing. Our biker club patches page covers these conventions in more depth.
Safety and hi-vis standards matter for trades and industrial uniforms. If patches are going on high-visibility workwear, confirm placement and colour choice don’t interfere with CSA-compliant reflective striping — a conversation worth having with your safety officer before finalizing placement.
Domestic shipping is fast. Manufacturers producing within Canada, rather than importing, can typically deliver from Vancouver to Toronto to Edmonton to Halifax within about a week of design approval, without the customs delays cross-border orders used to involve.
Expert Tips From the Embroidery Floor
- Order a small buffer above your exact headcount. Garments get lost and staff turn over; a top-up run later almost always costs more per unit than padding the original order slightly.
- Always review a digital proof before production starts. A five-minute check catches colour mismatches or sizing issues that would otherwise mean scrapping an entire run.
- Keep your digitized stitch file on record. If you’ll reorder — and most businesses do — having the file already digitized skips that cost and speeds up turnaround significantly.
- Don’t assume every “waterproof” claim means the same thing. PVC patches are waterproof by construction. Embroidered patches marketed as “water-resistant” describe the backing and thread treatment, not full waterproofing.
- Flag mixed sizing upfront. Ordering large back patches and small chest patches in the same run is common — just confirm your manufacturer prices it as two production setups, not one blended run.
Common Mistakes to Avoid
Sending low-resolution or unclear artwork. The single most common cause of delays — a blurry logo means guesswork during digitizing, and guesswork means revision rounds.
Choosing a size too small for the design’s detail. A detailed crest shrunk to fit a 1.5-inch cap patch loses its finer elements no matter how skilled the embroidery team is. Simplify the design or increase the size.
Picking iron-on backing for heavy-use workwear. It works initially, then fails after the third or fourth industrial wash. Match backing to actual use, not to what’s easiest to apply.
Overloading the design with text. A patch crammed with a tagline, a website, and a slogan on top of a logo usually ends up illegible. Pick the one or two elements that actually need to be there.
Not accounting for curved placement. A design digitized flat and applied to a curved cap or rounded seam can distort more than expected — mention curved placement before production, not after.
Your Pre-Order Checklist
- [ ] Patch type selected based on detail level and durability needs
- [ ] Backing type chosen based on wash frequency and use case
- [ ] Size confirmed against placement surface and viewing distance
- [ ] Artwork supplied as a vector file, or flagged for redraw if not
- [ ] Colour count kept reasonable (8 or fewer solid colours for embroidery)
- [ ] Text checked for minimum legible size
- [ ] Digital proof requested and reviewed before production
- [ ] Quantity set with a small buffer above exact headcount
- [ ] Turnaround confirmed against your actual deadline, including shipping
- [ ] Digitized file requested for your records, for future reorders
Why Choose Stitch Patches CA for Custom Embroidered Patches?
Stitch Patches CA works with Canadian businesses, motorcycle clubs, sports teams, schools, and individuals who need patches built around their actual design, not a template.
Custom designs, start to finish. Send a logo, a sketch, or a rough idea — our design team digitizes and refines it into a production-ready patch, with no design experience required on your end.
Every patch type under one roof. Embroidered, woven, PVC, chenille, printed, bullion, and leather — so the recommendation you get is based on what actually suits your project, not just what one machine can produce.
Quality checked at every stage. From artwork review through final inspection, patches are checked for stitch consistency, colour accuracy, and backing adhesion before they ship.
Support before you commit. We’ll walk through material, backing, and sizing decisions before production starts, not after — including a digital proof for review.
Built for bulk and repeat orders. Whether it’s a small club run or a national uniform rollout, tiered pricing and saved digitizing files make repeat orders faster and more cost-effective the second time around.
Get Your Free Design & Quote →
Frequently Asked Questions
What is a bullion patch? A bullion patch is embroidered using metallic gold or silver wire-wrapped thread, giving it a raised, formal finish. Most commonly used for military rank insignia, blazer crests, and heritage or ceremonial branding.
How long do custom embroidered patches last? With proper backing and reasonable care, embroidered patches routinely last for years without fraying or fading — sew-on backing on frequently washed garments holds up longest.
Are embroidered patches washable? Yes, in most cases. Wash inside out in cold or warm water, avoid high dryer heat, and choose sew-on backing for garments that will be washed regularly rather than iron-on.
How long does custom patch production take in Canada? Standard turnaround is typically 7–10 business days after design approval, with rush production available for time-sensitive orders. Complex designs with heavy detail or bullion work take longer.
Can I order custom patches with my own design? Yes. A logo, a sketch, or even a rough description is enough to start — a digitizing team can refine an existing design or build one from scratch into a production-ready stitch file.
What’s the difference between custom embroidered patches and embroidered badges? Functionally, none. “Embroidered badge” and “embroidered patch” describe the same product; the terminology varies more by industry (badge is more common in law enforcement and military contexts) than by construction.
Can I order custom patches for hats specifically? Yes. Hat and cap patches need different handling than flat-garment patches due to the curved surface — smaller sizing and a flexible backing, often Velcro, generally work best.
Are Velcro patches durable enough for regular use? Yes, when both the hook and loop sides are properly stitched to their respective surfaces. Velcro backing is standard on tactical gear specifically because it holds up to regular removal and reattachment.
What’s the minimum order quantity for custom embroidered patches? This varies by manufacturer. Many Canadian patch makers, including us, accommodate both small custom batches for individuals or startups and large bulk runs for established brands.
Do you offer custom embroidered patches in Toronto, Vancouver, Calgary, and Edmonton? Yes — orders ship nationwide across Canada, generally within 7–10 business days of design approval, whether you’re in Ontario, British Columbia, Alberta, Quebec, or anywhere in between.
What’s the best patch type for outdoor or tactical gear? PVC patches are generally strongest for genuine outdoor or wet-condition use, since they’re fully waterproof by construction. High-density embroidered patches with sew-on or Velcro backing are a solid second choice where a more traditional look is preferred.
Every patch on this page starts the same way: send us your logo, sketch, or idea, and we’ll turn it into a production-ready patch built around your exact use case — not a generic template.