
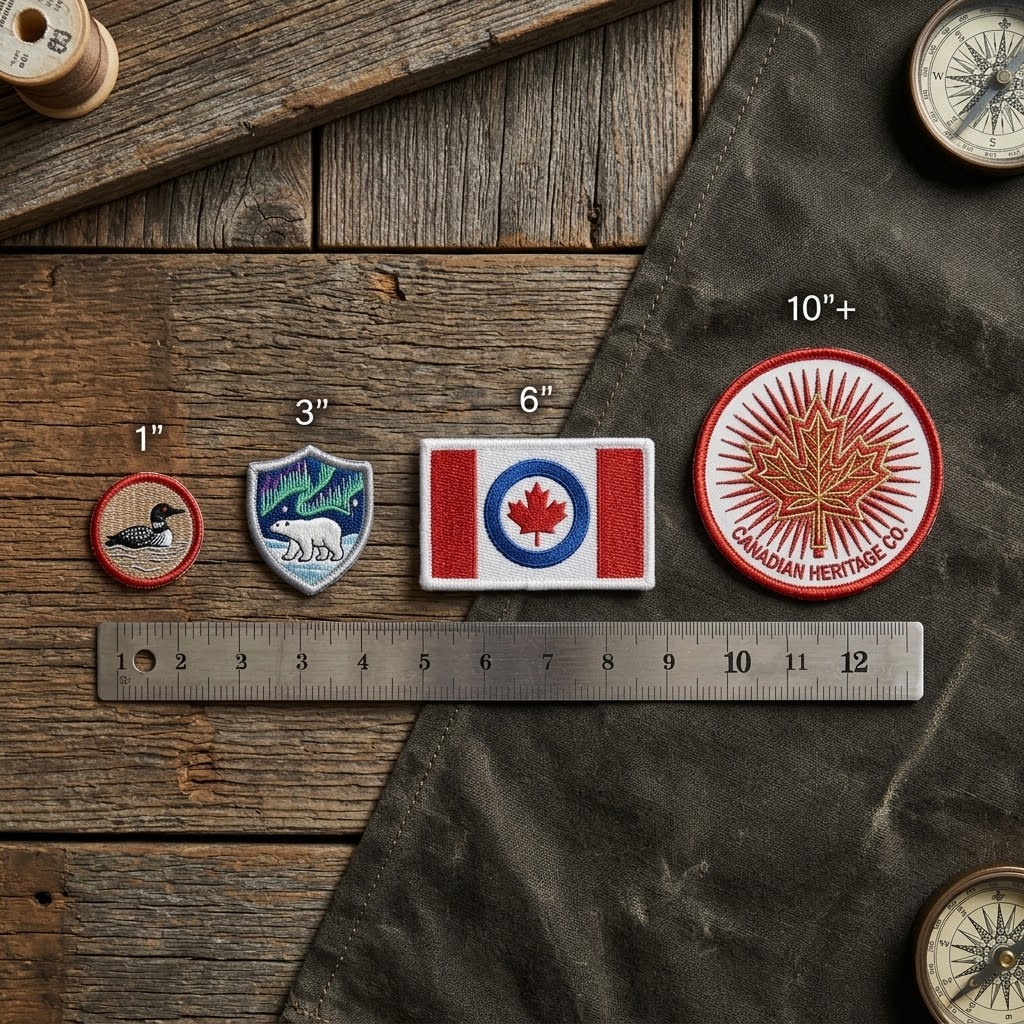
Quick answer: An embroidered patch can sometimes be made as small as about 1 inch (2.5 cm), but that does not mean every design will look good at that size. A simple symbol may work very small, while a detailed logo with tiny text may need 2–3 inches or more.
The real question is not:
“How small can you make my patch?”
It is:
“How small can my design be before it stops looking clear?”
That difference can save you from ordering patches with blurry text, crowded details, or lines that merge together.
Minimum Possible vs. Recommended Patch Size
This is the most important thing to understand.
There are two different answers to the question, “How small can an embroidered patch be?”
Minimum technically possible: The smallest size a manufacturer may be able to produce.
Minimum recommended size: The smallest size at which your actual design should still look clear, readable, and professional.
For example, a manufacturer may technically produce a 1-inch patch. But if your design includes a long business name, thin lines, and several tiny details, 1 inch may not be a good choice.
A patch can sometimes be made smaller than it should be made.
The best size is not always the smallest possible size. It is the smallest size that still keeps the important parts of your design clear.
What Decides How Small an Embroidered Patch Can Be?
There is no universal minimum because every design is different. These are the main things that affect how small your patch can be.
1. Design Complexity
Simple designs can usually be embroidered at smaller sizes.
A small patch may work well if it has:
- One bold letter or number
- A simple icon or symbol
- Large, clear shapes
- Thick lines
- Very little or no text
For example, a bold letter inside a simple circle can be made much smaller than a detailed company logo with a slogan, thin borders, and several small symbols.
The more details your design has, the more space it usually needs.
2. Small Text Needs More Space
Text is often the biggest problem when a patch becomes too small.
As a practical guideline, small embroidered lettering often needs around 4–6 mm of letter height to remain reasonably clear. However, this is not a universal rule. The right size depends on the font, thread, letter spacing, and embroidery method.
A short name such as NOVA needs much less space than:
NOVA OUTDOOR ADVENTURE COMPANY
More words usually mean you need a larger or wider patch.
If your text is too small, you can:
- Increase the patch size
- Shorten the wording
- Use a bolder and simpler font
- Remove unnecessary text
- Consider a woven or printed patch for very fine lettering
3. Thin Lines and Tiny Details
A digital design is not the same as embroidery.
On a screen, very thin lines can look sharp. But embroidery uses real thread with physical thickness. When a design becomes too small, thin lines may become thicker, merge together, or disappear.
Small gaps between details can also close up.
That is why a logo may look perfect on your computer but need changes before it can be embroidered successfully at a small size.
4. Font Choice Makes a Big Difference
If you want a small embroidered patch, choose the font carefully.
Fonts that usually work better at small sizes:
- Bold fonts
- Block fonts
- Simple uppercase lettering
- Fonts with clear spacing
Fonts that often need more space:
- Thin fonts
- Script fonts
- Decorative fonts
- Very narrow lettering
A simple rule is:
The thinner and more decorative the font, the larger the patch usually needs to be.
Color contrast also matters. Text is easier to read when the thread color clearly stands out from the patch background.
5. Stitch Density and Thread Thickness
Embroidery is made with thread, not ink.
When too many stitches are packed into a tiny area, the patch can become crowded and lose clarity. Thread thickness, stitch density, and the direction of stitches can all affect the final result.
This is why two patches with the same dimensions may not have the same minimum size. A simple design can work well at a size where a highly detailed design would fail.
How Small Should a Patch Be for Different Uses?
The right size also depends on where you plan to place the patch.
Hats and Caps
Small to medium patches usually work best. Because hats have curved surfaces and limited space, very detailed or oversized patches may not fit or look right.
Chest and Uniform Patches
Chest patches should be compact and balanced while keeping the logo and text easy to read.
Sleeves
Narrow or vertical designs can often use sleeve space better than wide designs.
Jackets
Medium-sized patches provide more room for text and detailed artwork.
Bags and Backpacks
Choose the size based on the available space and how far away people will normally view the patch.
Jacket Backs
Larger patches are usually better because they are designed to be seen from a greater distance. Detailed artwork and large text also have more room to stay clear.
When Should You Make the Patch Larger?
Make the patch larger when the small details are important to your design.
For example, if your logo includes a recognisable symbol, business name, and fine details, removing too much may change how the logo looks. In that situation, increasing the patch size may be better than oversimplifying the artwork.
However, if some tiny details are not important, simplifying the design may allow you to keep the patch smaller.
Ask yourself:
What matters more: keeping the patch small or keeping every important detail clear?
When Are Woven or Printed Patches a Better Choice?
Embroidery is not always the best option for extremely fine details.
Woven patches can be a better choice for tiny text, thin lines, and detailed artwork. They generally have a flatter surface and can show finer details more clearly.
Printed patches may be better when the design contains very small details, complex artwork, or effects that are difficult to reproduce with thread.
If your design becomes unclear every time you reduce its size, changing the patch type may be better than forcing the design into a very small embroidered patch.
Is My Patch Design Too Small? A Quick Check
Before placing your order, ask yourself:
✓ Can I read all the text without zooming in?
✓ Are the smallest lines still clearly separate?
✓ Are important details easy to recognise?
✓ Is my font bold and simple enough for embroidery?
✓ Is there enough space between letters and design elements?
✓ Will the patch still look clear from its normal viewing distance?
✓ Would making the patch slightly larger improve the final result?
If you answer “no” to two or more of these questions, your design may be too small or too detailed for that patch size. Consider making it larger, simplifying the artwork, or choosing a different patch type.
Get a Digital Proof Before Production
One of the smartest things you can do before ordering custom patches is request a digital proof or artwork review.
A proof can help you check:
- Text size and readability
- Spacing between details
- Patch proportions
- Overall layout
- Details that may be too small for embroidery
A design can look good on a screen but still need changes for embroidery. Reviewing a proof before production gives you a chance to fix problems early.
Final Answer: How Small Can an Embroidered Patch Be?
A simple embroidered patch may sometimes work at around 1 inch, while a detailed design with small text and fine artwork may need 2–3 inches or more.
There is no single minimum size that works for every patch.
The best size depends on your:
- Design complexity
- Amount of text
- Font style
- Line thickness
- Small details
- Stitch density
- Patch placement
- Normal viewing distance
The goal should not be to make your patch as small as possible. The goal should be to choose the smallest size that still makes your design look clear, readable, and professional. Read this blog is you wants to know about costing guide How Much Do Custom Patches Cost in Canada?
Before production, get a digital proof and ask your patch manufacturer whether your design is suitable for the size you want. A small adjustment before production can make a big difference in how your finished embroidered patches look.