
Adding patches to your clothing or accessories is one of the simplest and most creative ways to personalize your wardrobe. Whether you’re covering a stain, making a fashion statement, or showcasing your personality, iron-on patches are a versatile choice. Not only are they easy to apply, but they’re also durable and can give your belongings a unique flair.
If you’re new to this trend or feeling unsure about where to start, this guide is here to walk you through the process. By the end, you’ll be confident in applying iron-on patches to your favorite items with ease and precision.
What You’ll Need to Iron On Patches
Before jumping into the process, it’s essential to gather the right tools and ensure you’re working with appropriate materials. Proper preparation can make all the difference in ensuring your patches adhere firmly and look great.
Tools and Materials Checklist
- Fabric – Choose a fabric that responds well to high temperatures, such as cotton or polyester. Delicate fabrics like silk or nylon are not ideal for iron-on patches.
- Iron-on patches – Pick designs that complement your style or the items you’ll be customizing.
- Flat workspace – Use a sturdy, heat-resistant surface, like an ironing board.
- Iron – A household iron with adjustable temperature settings works perfectly.
- Thin cloth or towel – This acts as a pressing cloth to protect both the patch and the fabric.
- Optional tools – A piece of parchment paper can be used as an alternative pressing cloth.
By gathering these items beforehand, you’re setting yourself up for a smooth, interruption-free process.
Step-by-Step Guide to Applying Iron-On Patches
Follow these steps to ensure your patches are applied securely and look professional.
1. Prepare the Fabric and Surface
Start by preparing the item you want to decorate.
- Wash the fabric to remove any dirt, oil, or residue. This ensures the adhesive sticks properly.
- Lay the item flat on an ironing board or other heat-resistant surface. Make sure there are no wrinkles in the fabric.
2. Position the Patch
Before heating the patch, decide exactly where you want it to go.
- Place the patch with the adhesive backing facing the fabric.
- If you’re applying multiple patches, take the time to ensure they’re evenly spaced and well-aligned.
- Double-check the positioning once the patch adheres, it can be challenging to adjust.
3. Set Up the Iron
Adjusting the iron’s temperature is critical to avoiding damage to both the fabric and the patch. Here’s how to do it correctly.
- Set the iron to a medium to high setting, typically labeled as “cotton” on most irons, with no steam.
- Wait for the iron to fully heat to the selected temperature. Using it while cold or partially heated won’t properly activate the glue.
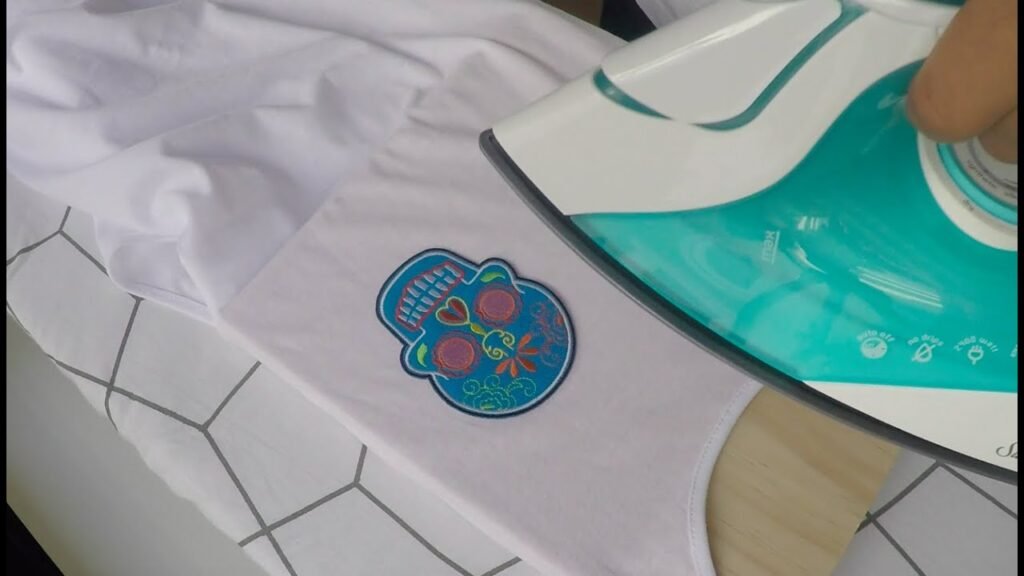
4. Apply the Patch
Now comes the actual bonding process. Follow these steps to secure your patch.
- Place a thin cloth or towel over the patch. This protects it from direct heat, which could damage the design.
- Firmly press the iron down on top of the covered patch for about 15-20 seconds. Use even pressure but avoid moving the iron back and forth, as this can shift the patch.
- Repeat the process for any edges that aren’t fully adhered.
5. Check the Adhesion
After ironing, allow the patch to cool for a couple of minutes. Gently tug at the edges to see if it’s securely attached.
- If the edges lift, repeat the ironing process, applying additional heat and pressure for another 10 seconds as needed.
6. Allow the Patch to Set
Once satisfied with the adhesion, give the patch ample time to cool fully before wearing or using the item. This helps the adhesive bond securely to the fabric.
Caring for Your Iron-On Patches
To make your patches last, you’ll want to follow proper care guidelines. Even the strongest adhesives can weaken with excessive washing or poor fabric care.
Washing Tips
- Turn the item inside out before washing to prevent the patch from rubbing against other items.
- Use cold water on a gentle cycle to reduce wear.
- Avoid using bleach or harsh detergents that could degrade the adhesive.
Drying Tips
- Air-drying is ideal, as high heat from a dryer can loosen the adhesive over time.
- If you must use a dryer, set it to a low heat setting.
Maintenance Tips
- For patches that begin to lift with repeated use, reapply heat using the same ironing method detailed above.
By taking these steps, you’ll keep your patches securely in place and looking vibrant for years to come.
Get Creative with Patches!
Now that you know how to apply iron-on patches, the possibilities are endless. Whether it’s a denim jacket, a backpack, or a pair of jeans, patches give you an easy way to express yourself. For a custom look, mix and match styles or combine iron-on patches with sewn patches for extra durability.
Why not give it a try? Add a personal touch to your wardrobe and show off your creative flair. Share your patch-decorated creations on social media or with friends it’s a conversation starter and a fun