
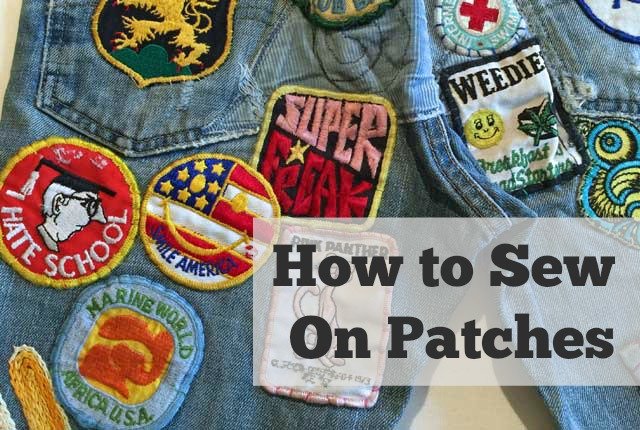
Adding patches to clothes or accessories isn’t just about fixing tears. It’s also a way to personalize your wardrobe, showcase your style, or even extend the life of your favorite items. Whether it’s a trendy design, a symbol of achievement, or a sentimental keepsake, sewing patches can transform plain fabric into something meaningful and unique. This friendly guide will walk you through everything you need to know to sew patches like a pro even if you’re just getting started.
Why Sew on Patches?
Sewing patches is both practical and creative. Here are some common reasons people love this craft:
- Repairing clothing: Patches can cover up holes and tears, breathing new life into worn-out items.
- Personalization: Use patches to add character to jackets, jeans, bags, or hats.
- Commemoration: Display achievements, like scout badges or team emblems, proudly on uniforms.
- Sustainability: Extend the life of your garments by patching them rather than throwing them away.
Whether you’re looking to restore a beloved piece or express your unique personality, sewing patches is a timeless skill worth mastering!
Materials Needed for Sewing Patches
Before you start attaching patches, it’s important to gather the right tools. Here’s what you’ll need for the job:
- The patch: Choose a patch that matches your aesthetic or purpose, available in fabrics like embroidery, denim, or leather.
- Needle: A sharp, sturdy needle is essential for pushing through fabric and the patch’s sometimes thick material.
- Thread: Use a thread color that blends with or contrasts the patch, depending on the effect you want.
- Fabric scissors: These ensure clean cuts, especially if you need to shape or adjust the patch.
- Pins or clips: To hold the patch securely in place while you sew.
- Thimble (optional): Useful for protecting your fingers if the fabric is tough.
- Stitch ripper: A handy tool for fixing any mistakes during sewing.
Now that your materials are ready, it’s time to start sewing!
Step-by-Step Guide to Sewing Patches by Hand
Sewing patches by hand might seem daunting at first, but following these simple steps will make the process smooth and enjoyable.
1. Prepare the fabric and patch
Start with clean, dry fabric. Ensure the area where you’ll place the patch is free of wrinkles by ironing it, if needed. Similarly, check that your patch is flat and ready for use.
2. Position the patch
Decide where you want to place the patch. Once you’ve found the perfect spot, pin or clip it securely to prevent it from shifting during sewing. For extra security, use fabric glue or double-sided tape to temporarily stick the patch to the fabric.
3. Thread the needle
Cut a length of thread about 18–24 inches long to make it manageable. Thread the needle and tie a knot at the end to secure it. Match your thread color to the edge of the patch for a seamless look, or opt for a contrasting color to make your stitches pop.
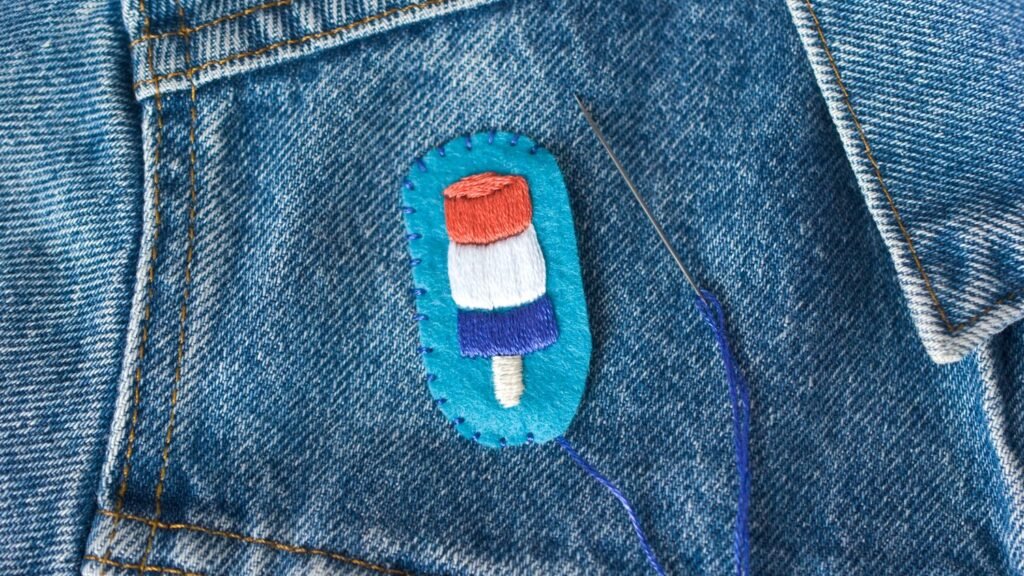
4. Start sewing
Begin sewing by inserting the needle from underneath the fabric to hide the knot. Use a straight stitch (in-and-out motion) or a whip stitch (circling around the edge of the patch) to secure it in place. Take your time and keep your stitches even for a professional finish.
5. Knot to finish
Once you’ve stitched all the way around the patch, tie a small knot on the underside of the fabric to secure the thread. Trim any excess thread to keep things neat.
Congratulations you’ve sewn your first patch by hand!
Tips for Sewing Patches on Different Types of Fabric
Different fabrics can influence how you approach patch sewing. Use these tips for the best results across a variety of materials.
Denim or Heavy Fabric
- Use a thicker needle to handle the sturdy material.
- Consider using a sewing machine if the fabric is too tough to sew by hand.
Delicate Fabrics (e.g., Silk)
- Handle with care to avoid damaging the material.
- Opt for lighter patches and finer needles to reduce strain on the fabric.
Stretchy Fabrics
- Stretch the fabric slightly while pinning the patch to prevent puckering.
- Use stretch-friendly thread for a secure hold.
Leather or Faux Leather
- Use a leather needle, which is designed to pierce durable materials.
- Test your technique on a scrap piece of leather to avoid mistakes.
Common Mistakes to Avoid When Sewing Patches
To make your patch-sewing experience as smooth as possible, steer clear of these common missteps:
- Skipping preparation: Whether it’s ironing the fabric or positioning the patch carefully, skipping these steps can lead to uneven results.
- Using the wrong needle or thread: This can cause frustration and create poorly attached patches. Select your tools based on your fabric and patch type.
- Rushing your stitches: Uneven or loose stitches can unravel quickly. Take your time for better results.
- Neglecting to finish knots: Always tie off your thread securely to prevent your work from coming undone.
- Not practicing first: If you’re new to sewing, practice on scrap fabric before attaching a patch to your favorite item.
Give Patch Sewing a Try!
Sewing patches is a fun and useful skill that opens up endless creative possibilities. Whether you’re fixing a tear or customizing your wardrobe, this DIY technique gives new life to your belongings and allows you to express your personal style. Start small, practice your stitches, and soon you’ll be a patch-sewing pro.